How to post process Fluent jobs#
Ethos#
Visualization can be resource-heavy in Fluent. After completion of your run, reports, files, contours, streamlines, and time-step data need to be visualized and prepared for your presentations or papers. Doing this locally would mean one would have to copy the Fluent files to a local system, and then open it in the local Ansys installation, which could be a long step. ADA provides a separate features for visualization as well as post-processing. The visualization nodes is envisioned in this regard to provide better hardware to accommodate large visualization tasks. This not only provides a better infrastructure to postprocess large data files, but also saves time by avoiding the need to copy those files to another system just to post-process.
Via OpenOnDemand#
This step would remain same as Using a VNC desktop session via Open OnDemand for logging in and opening an OpenOnDemand session.
Once the session is open, one could simply load the fluent module using
module load ansys-uoneasy/2022R2
And Fluent can now be used as a regular software within ADA. Note that this can be opened in the directory where Fluent post processing files are saved, in order to directly read the file within a Fluent session.
Note that, in order to postprocess here, there should be a CAS and DAT file for Ansys should be available, and must be saved after the case has completed its run.

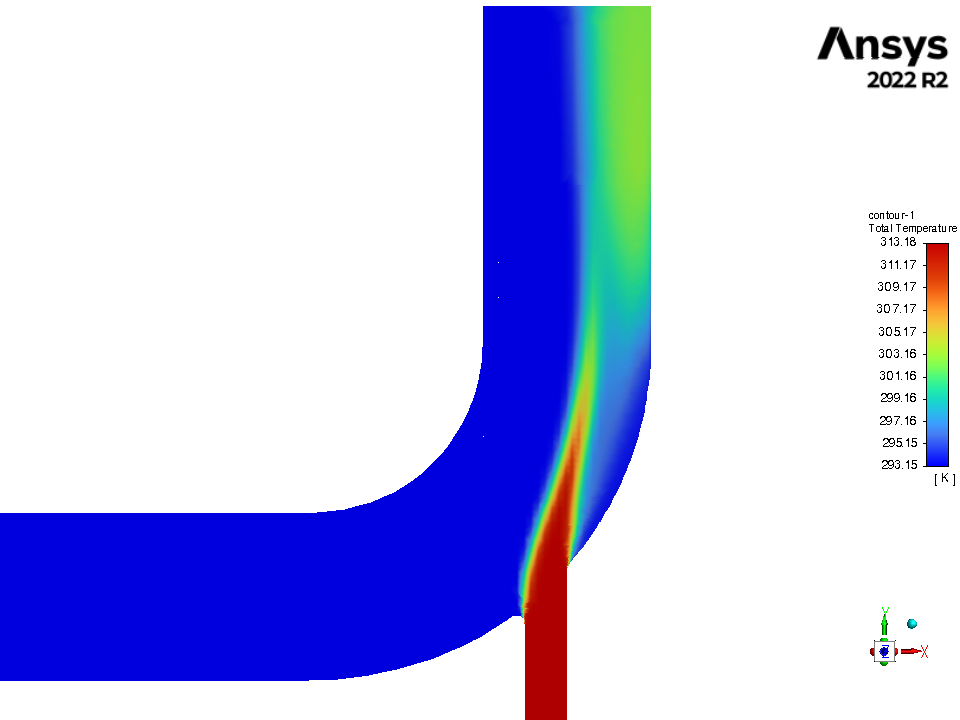
The above image indicates on how one can use OOD to post process Ansys fluent.
Once the VNC session is available, start a terminal and load the Fluent module. Type
fluentto start Fluent session.Import the saved CAS and DAT files within Fluent console.
Post process the surface, line graphs etc and save as a regular png file.
Via Visualization Nodes#
Download MobaXterm and follow instructions provided here to create a remote visualization session
See the steps in the following images, once MobaXTerm has been installed. (Note that visnodes can also be opened via the WinSCP (UoN) client present in university issued devices.)
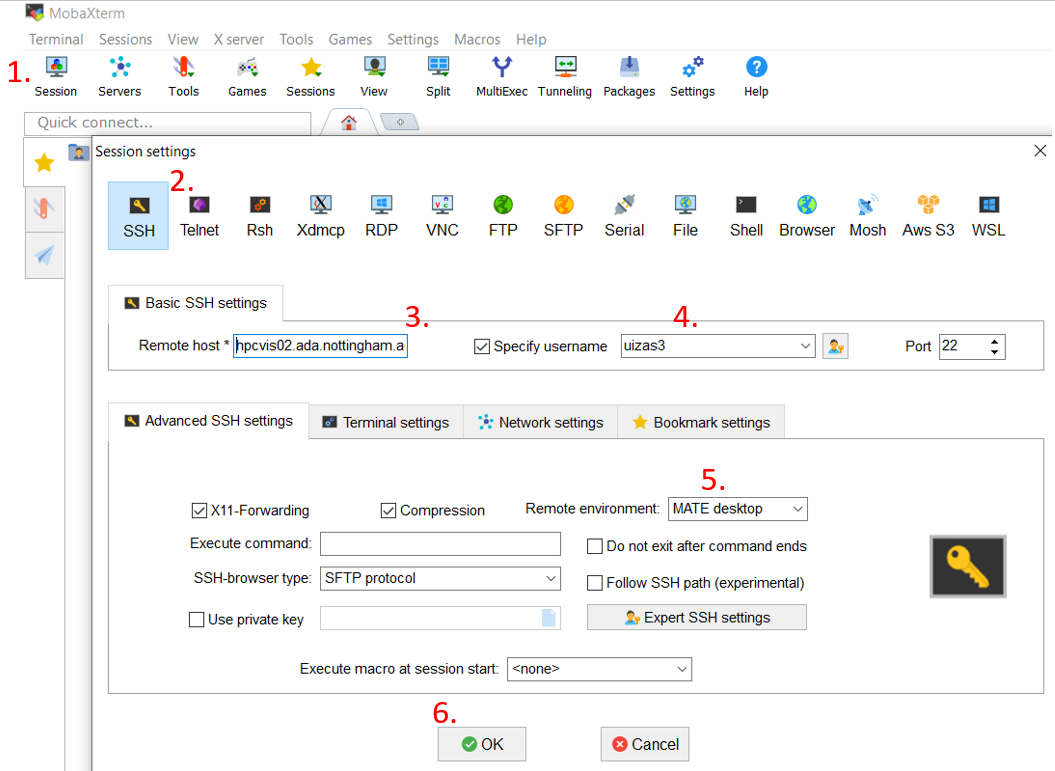
Click session.
SSH
Enter the visualization node address, i.e hpcvis02.ada.nottingham.ac.uk or hpcvis01.ada.nottingham.ac.uk.
Enter your user id.
Select MATE desktop (This is the home screen type that will be created once your resource is available.)
Select OK.
After some time, a session would open that would resemble a linux home screen session, where a terminal can be opened by right clicking on the screen. The Fluent session can then be opened just as a regular terminal command, allowing the user to post-process Fluent based files.